The Homemade Crackers That Made Me Never Buy Store-Bought Again
When Snack Time Called, This Recipe Answered
I still remember that party planning evening clearly.
The smell of rosemary and olive oil wafting.
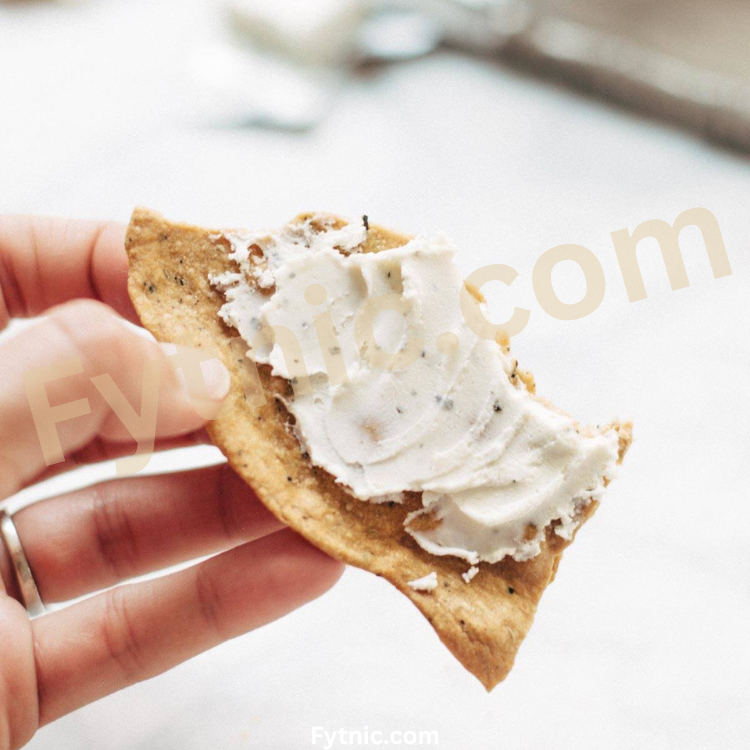
Crispy flatbread crackers cooling on the counter.
And me thinking about every cheese board.
Every charcuterie platter I’d assembled before honestly.
They all promised one thing consistently too.
That impressive artisan cracker experience absolutely.
But store-bought never quite delivered on it.
The crackers were always too bland clearly.
Too expensive. Not special enough at all.
I was skeptical when making these first.
But something felt different this time around.
The Secret Nobody Talks About
Here’s what most people don’t realize:
They think crackers are complicated to make.
They hope store-bought ones taste homemade somehow.
They rarely do. Trust me on this.
But this recipe starts with something magical:
Eight basic ingredients you already have entirely.
Flour, water, olive oil creating simple base.
No yeast. No complicated techniques whatsoever needed.
My kitchen smelled like an Italian bakery.
The dough came together in one bowl.
This wasn’t just crackers anymore though honestly.
This was instant upgrade to entertaining always.
The Plot Twist I Discovered
But here’s the buried lead honestly speaking:
These customizable crackers work for everyone actually.
Vegan, dairy-free, egg-free, nut-free naturally always.
Kids love them. Adults impress guests completely.
Rosemary for Italian vibes instantly created beautifully.
Everything bagel for brunch lovers perfectly suited.
Sesame seeds for Asian-inspired boards gorgeously.
Black pepper and thyme for elegant affairs.
I honestly didn’t expect such versatility immediately.
First batch? Absolute addictive perfection throughout entirely.
Crispy edges. Flaky texture. Restaurant-quality results always.
You taste homemade love in every bite.
Building The Perfect Flatbread Crackers
The dough comes together in minutes flat.
Whisk flour with salt, sugar, seasonings together.
Add garlic and onion powder for depth.
Mix in chopped fresh herbs directly now.
Pour water and olive oil into bowl.
Stir with wooden spoon until combined completely.
Turn out onto floured surface for kneading.
Knead one minute until smooth ball forms.
Let it rest 10 minutes minimum time.
The gluten relaxes making rolling easier always.
This resting step is absolutely essential honestly.
Don’t skip it or you’ll regret later.
The Rolling That Changes Everything
While dough rests developing perfect texture:
Cut dough in half for easier handling.
Roll first half incredibly thin on counter.
The thinner you roll, the crispier result.
Use ruler and pizza cutter for cutting.
Create rectangles about 3 by 1.5 inches.
Don’t worry about perfect shapes at all.
Rustic charm is part of the beauty.
Dock with fork to prevent bubbling too.
Brush with olive oil generously all over.
Sprinkle flaky sea salt on top liberally.
Add extra herbs or seeds if desired.
The Baking That Seals The Deal
While crackers wait on baking sheets patiently:
Bake at high heat 425 degrees Fahrenheit.
Takes only 9-12 minutes until golden brown.
Rotate pans halfway through for even browning.
Watch carefully—they go from perfect to burnt.
Kitchen fills with incredible aroma throughout entirely.
Remove when golden and crispy looking always.
Let cool completely on pans before eating.
They crisp up even more while cooling.
This cooling time is crucial for texture.
First bite will be warm and flaky.
You’ll never want store-bought crackers again period.
What Makes This Recipe Actually Special
One bowl. One hour. Pure artisan magic.
No mixer or food processor required here.
The simple dough uses basic pantry ingredients.
Endlessly customizable for any flavor profile desired.
Perfect for cheese boards and charcuterie platters.
Dairy-free makes them accessible for everyone always.
Kids can help with rolling and cutting.
Everyone from beginners to experienced bakers succeeds.
Serve with hummus, crab dip, or cheese.
Pair with soups for satisfying crunch always.
This is entertaining made incredibly easy honestly.
Easy Homemade Flatbread Crackers Recipe
Prep Time: 40 minutes
Cook Time: 12 minutes per batch
Total Time: 1 hour 20 minutes (includes cooling)
Servings: 75-80 crackers
Difficulty: Easy
Why This Recipe Works
The magic happens in three key steps:
First: Basic ingredients and one-bowl mixing makes this accessible for anyone.
Second: Resting the dough allows gluten to relax, making it easier to roll paper-thin.
Third: High-heat baking (425°F) creates perfectly crispy, golden-brown crackers.
This isn’t complicated artisan baking. It’s simple pantry ingredients transformed into impressive crackers. The small amount of sugar inhibits gluten development and helps browning. Rolling them ultra-thin is the key to achieving that perfect crispy snap.
Ingredients You’ll Need
For the Basic Cracker Dough:
- 2 cups (250g) all-purpose flour, plus more for kneading/rolling
- 1 teaspoon granulated sugar
- 1 teaspoon salt
- ½ teaspoon onion powder
- ¼ teaspoon garlic powder
- 1 tablespoon flavor add-in (see variations below)
- ⅔ cup (160ml) water
- 3 tablespoons extra virgin olive oil, plus more for brushing
- Flaky sea salt (like Maldon) for topping
Flavor Variation Options (Choose One):
- Rosemary: 1 tablespoon finely chopped fresh rosemary
- Black Pepper & Thyme: 2 teaspoons freshly cracked black pepper + 1 tablespoon fresh thyme
- Everything Bagel: 1 tablespoon everything bagel seasoning + 1 tablespoon dried chives
- Sesame Seed: 1½ tablespoons sesame seeds (plus more for topping)
Instructions
Step 1: Make The Simple Dough
- In large bowl, whisk together all dry ingredients
- Add flour, sugar, salt, onion powder, garlic powder
- Mix in your chosen flavor add-in thoroughly
- Make well in center of dry ingredients
- Pour in water and olive oil together
- Stir with wooden spoon or silicone spatula
- Mix until dough comes together in clump
- Dough will be slightly wet and shaggy
Why This Works: No mixer needed. Simple stirring brings everything together in under 2 minutes.
Step 2: Knead The Dough Briefly
- Turn dough out onto lightly floured surface
- Lightly flour your hands to prevent sticking
- Sprinkle a little flour on dough itself
- Knead gently, adding flour as you go
- Knead only 1-2 minutes until dough isn’t sticky
- Shape into rough ball when no longer tacky
- Return dough to bowl and cover with plastic
- Let rest at least 10 minutes (up to 1 hour)
Crucial Tip: Don’t skip the resting time! The gluten needs to relax so you can roll the dough thin. If you try to roll it immediately, it will shrink back frustratingly.
Step 3: Prep Your Workspace
- Preheat oven to 425°F (218°C)
- Line large silver baking sheets with parchment paper
- Don’t use dark pans—crackers will over-brown
- Gather rolling pin, ruler, pizza cutter nearby
- Have small bowl of olive oil with brush
- Keep flaky sea salt within reach too
- This setup makes assembly much faster
Organization Matters: Having everything ready before you start rolling makes the process smooth and enjoyable.
Step 4: Roll The Dough Paper-Thin
- Cut rested dough in half with knife
- Keep one half covered while working with first
- On lightly floured surface, start rolling dough
- Roll it out into rough rectangle shape
- Keep rolling until incredibly thin—almost translucent
- Aim for about 1/16 inch (1.5mm) thickness
- If dough shrinks back, cover and rest 5 minutes
- Try again after gluten relaxes further
- The thinner you roll, the crispier final result
Rolling Trick: If dough keeps snapping back, it needs more rest time. Be patient. It will eventually cooperate!
Step 5: Cut Into Crackers
- Use ruler to measure approximately 3 x 1.5 inches
- Cut dough with pizza cutter or fluted pastry wheel
- Don’t worry about perfect rectangles at all
- Rustic, uneven edges add homemade charm beautifully
- You’ll get 35-40 crackers per half of dough
- Carefully transfer cut crackers to baking sheet
- Use offset spatula if crackers are very thin
- Space crackers slightly apart on pan
Realistic Expectations: They won’t look machine-cut. That’s the beauty! Handmade crackers have character.
Step 6: Dock, Oil, And Season
- Poke each cracker several times with fork
- This docking prevents large bubbles from forming
- Some small bubbles are normal and expected
- Brush each cracker generously with olive oil
- Make sure oil reaches all edges completely
- Sprinkle flaky sea salt over all crackers
- Add extra seasonings if desired (sesame seeds, everything bagel)
- Press toppings gently into dough so they stick
Topping Tip: Extra toppings can fall off when eating. Press them in gently before baking to help them adhere.
Step 7: Bake Until Golden And Crispy
- Bake at 425°F for 9-12 minutes total time
- Exact time depends on thickness and size
- Rotate pan halfway through for even browning
- Watch carefully—they go from perfect to burnt fast
- Crackers are done when golden brown all over
- Edges should be slightly darker than centers
- Remove from oven when nicely browned throughout
- Let cool completely on baking sheet on rack
- They crisp up more as they cool down
- Repeat entire process with second half of dough
Temperature Matters: High heat is essential for crispy crackers. Lower temperatures make them tough and chewy.
Nutrition Per Serving (5 crackers)
- Calories: 95
- Carbs: 13g
- Protein: 2g
- Fat: 4g (from olive oil)
- Fiber: 0.5g
- Sodium: 160mg (with salt topping)
Storage Tips
Room Temperature: Store in airtight container in dry place for up to 2 days maximum.
Re-Crisping: Spread on baking sheet and bake at 350°F for 10 minutes. Cool completely before serving.
Freezing: Freeze cooled crackers in airtight container up to 3 months. Thaw at room temperature. Re-crisp in oven.
Important Note: Homemade crackers get stale faster than store-bought because they have no preservatives. Make them fresh for best results.
Frequently Asked Questions
Why do my crackers taste bland?
You need flavor in the dough. Don’t make them plain! The garlic and onion powder are essential, plus you must add one of the flavor variations (rosemary, everything bagel, sesame, etc.). Plain crackers taste like wontons.
Can I use gluten-free flour?
Not recommended. Multiple test batches with different GF flours came out chip-your-teeth hard. Look for a cracker recipe specifically developed to be gluten-free instead.
What about whole wheat flour?
Crackers made with 100% whole wheat flour were quite hard and tough. You can try using half all-purpose and half whole wheat flour for slightly denser crackers.
Why do my crackers keep shrinking when I roll them?
The gluten needs to relax. Cover the dough and let it rest for 5 minutes, then try rolling again. This is completely normal, especially at first. Be patient!
How thin should I really roll the dough?
As thin as you can! Aim for about 1/16 inch (1.5mm). You should almost be able to see through the dough. Thin crackers = crispy crackers. Thick crackers = chewy crackers.
Can I use a pasta maker to roll them?
Yes! Several readers have had great success using a pasta machine to get them uniformly thin. This is actually a clever shortcut.
Why did my crackers burn in some spots?
Ovens have hot spots. Rotate the pan halfway through baking. Also, make sure you’re using a light-colored (silver) baking sheet, not a dark one.
How many crackers does this recipe make?
About 75-80 crackers total, depending on how thin you roll them, how large you cut them, and how much scrap you discard. Most people lose count!
Variations & Creative Ideas
Make Them Your Own
Sweet Cracker Versions:
- Halve the recipe and add extra sugar to dough
- Brush with oil then sprinkle cinnamon sugar on top
- Add vanilla extract and use honey instead of sugar
- Top with coarse sugar crystals before baking
Spicy Variations:
- Add cayenne pepper or red pepper flakes to dough
- Mix in za’atar spice blend for Middle Eastern flavor
- Include smoked paprika for smoky heat
- Top with chili lime seasoning before baking
Cheese Lovers:
- Add ¼ cup grated Parmesan to the dough
- Sprinkle with additional Parmesan before baking
- Mix in Italian seasoning with the cheese
- Try Asiago or pecorino Romano instead
Herb Garden:
- Fresh basil and oregano for Italian crackers
- Dill and lemon zest for fresh spring flavor
- Sage and brown butter for fall vibes
- Lavender and sea salt for floral notes
Serving Suggestions
For Cheese Boards:
- Pair with soft cheeses like brie and camembert
- Serve alongside aged cheddar and gouda
- Include with goat cheese and honey drizzle
- Arrange with blue cheese and fig jam
With Dips:
- Hummus (classic chickpea or roasted red pepper)
- Crab dip or hot artichoke dip
- Spinach and bacon dip warm from oven
- Whipped feta with herbs and lemon
Soup Partners:
- Tomato soup for classic pairing
- Creamy chicken noodle soup
- French onion soup instead of bread
- Butternut squash soup in fall
The Real Talk Section
Here’s what readers are saying honestly:
“These are the best crackers I’ve ever eaten.” – Multiple families
“I don’t think I’ll ever go back to store-bought.” – Cheryl from comments
“So easy my 3-year-old helped make them!” – Elyanna from reviews
“Made these twice in three days.” – Every person who tries them
But let me be real too:
Some people struggle getting them thin enough.
A few find the first batch challenging honestly.
The crackers can burn if you’re not careful.
Not everyone has time to roll 50 crackers.
Getting them transferred without breaking takes practice.
The key? Watch the video tutorial first.
Start with half batch to get comfortable.
Don’t worry about perfect shapes at all.
My Final Thoughts
This isn’t just another cracker recipe period.
It’s the recipe that upgrades cheese boards.
The one that makes entertaining effortless always.
The technique that impresses without intimidating completely.
Whether you’re hosting a party or not.
Whether you’re experienced or first-time baker.
Whether you want fancy or casual snacks.
These crackers work for everyone absolutely period.
So here’s my question for you clearly:
What’s your favorite cheese board memory honestly?
The one with perfect crackers and pairings?
The snack that makes guests say “wow”?
I want to hear your entertaining stories.
Drop a comment below and let’s swap cracker-making adventures together!